Contents
A custom Anki note type for studying Japanese. Specifically optimized for sentence mining with Yomichan.
Updated 02/07/2023
If you're migrating from a previous version version, please see the Migration Instructions
Features
#- Kanji Hover on the front and back
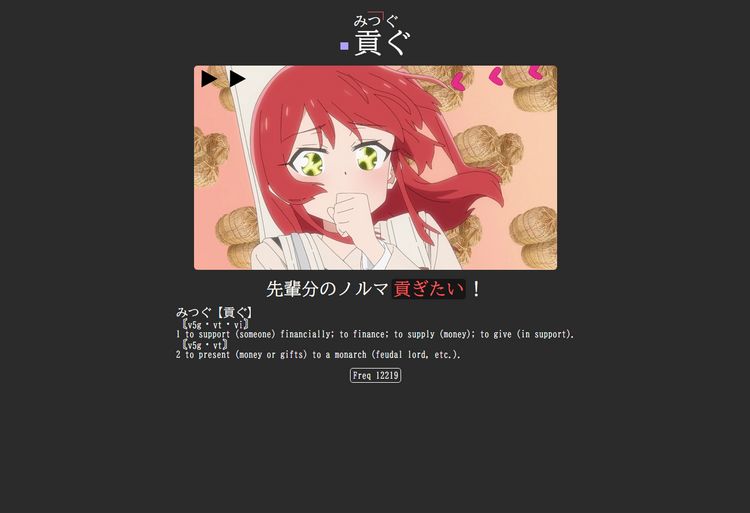
- Word/Sentence audio on back with replay buttons overlayed on the image
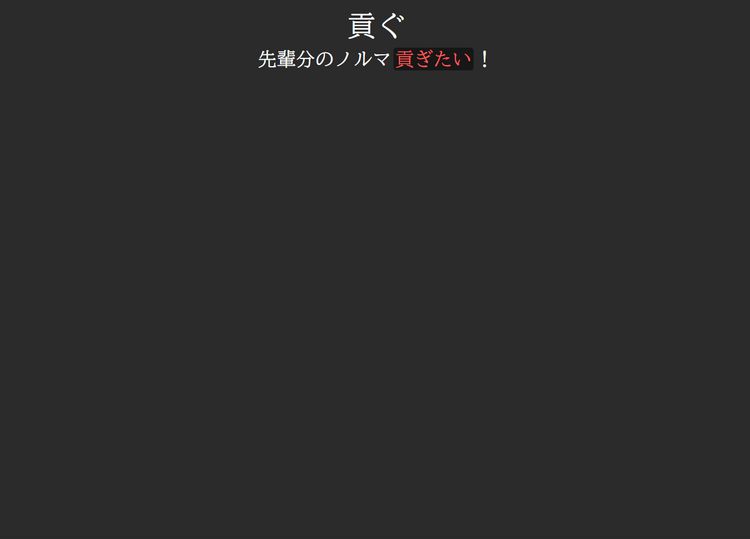
- Shows dictionary form of the target word at the top, and automatically highlights the conjugated version of the word in the sentence
- * Shows reading of the target word as furigana, with pitch drops marked
- * Optional colored box indicates pitch pattern of the word (using 0 javascript)
- * Whitespace and parenthesis automatically removed from the sentence field
- * Multiple alternative stylings available for cards with NSFW images
- * Automatically sort all new cards by their frequency
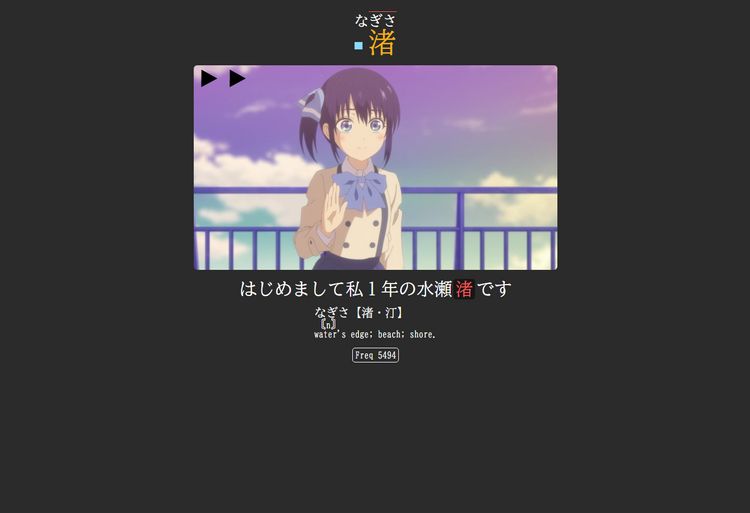
- Alternative coloring for proper noun cards
- Tested on both desktop and mobile
* Points marked with an asterisk require my yomichan settings (contained within the download), see my handlebars changes for more information.
How To Use
#- Click the download link and open the .apkg file. It should have imported a deck (with 1 card) into Anki. You can immediately delete this deck if you want, but sharing decks is currently the only way to share note types. Now you should have a note type called EminentV2.4.
- Import my Yomichan settings (alternatively you can just copy my handlebars and Anki card configuration settings)
- You'll also want to update your audio settings
- Set up Anki to auto reorder cards by frequency
- If you're going to be mining from VNs, set up ShareX
- Optionally choose a custom style for NSFW images
- That's it! Start mining :)
Explanation of Fields
#Pretty much all fields are optional, so just use the ones that you have the data for.
- wordDictionaryForm
- This is the dictionary form of the word. It will appear separate from the sentence at the top of the card.
- In yomichan put
{expression}here
- sentence
- In yomichan put
{cloze-prefix}<span class="highlight">{cloze-body}</span>{cloze-suffix}here
- In yomichan put
- reading
- This is for the kana form of the target word. This field will be displayed as furigana, with pitch drops marked.
- In yomichan put
{pitch-accents}here - If you don't want pitch drops marked, put
{reading}instead.
- definition
- In yomichan put
{glossary-brief}here
- In yomichan put
- wordAudio
- Audio that corresponds to wordDictionaryForm.
- In yomichan put
{audio}here
- sentenceAudio
- Audio that corresponds to sentence.
- In yomichan this will be blank, and it will have to be added from another source.
- picture
- In yomichan this will be blank, and it will have to be added from another source. Depending on your mining setup, you may put
{clipboard-image}here.
- In yomichan this will be blank, and it will have to be added from another source. Depending on your mining setup, you may put
- pitchAccent
- The pitch accent graph of wordDictionaryForm.
- In yomichan put
{pitch-accent-graphs}here
- frequency
- Rarity of wordDictionaryForm according to some frequency list(s).
- In yomichan put
{freq}here
Proper Noun Cards
#For those who would like to learn to read proper nouns through mining rather than the proper nouns deck, I've overridden the bold styling on the card to change the color of text. This means, whenever you mine a proper noun, you can simply make the wordDictionaryForm bold, and the color of the word on the card will change to yellow. This will indicate that you only need to test yourself on the reading, not the meaning.
Of course, even if you aren't mining proper nouns, this feature may also be useful for cards that have many definitions, and you want to focus on only one or two.

Pitch Accent Features
#This will only work using my Yomichan export settings
Pitch Accent Colors
#If you choose to have it enabled, this note type supports color coding your target word based on the system popularized by MIA/Migaku. Rather than coloring the entire word, this note will put a square next to the word that is the color of the pitch pattern.
The pitch accent styling is highly customizable, and even toggleable if you would prefer not to have it at all. Thus, I thought it warranted a bit of explanation so you can edit it to fit your preferences.
Using my template settings, Yomichan will export the dictionary form of the word wrapped in a span with one of the following classes:
- .heiban
- .atamadaka
- .nakadaka
- .odaka
- .kifuku
For example, it might look like this:
<span class="heiban">平日</span>By default, I have the following CSS on the note type:
/****** colors ******/
:root {
	--red: #fd5c5c;
	--blue: #89daff;
	--orange: #fca311;
	--green: #4e937a;
	--purple: #afa2ff;
}

/****** pitch accent colors ******/
.pitch .heiban::before {
	content: "";
	display: inline-block;
	height: 0.7ch;
	width: 0.7ch;
	margin-right: 10px;
	margin-bottom: 0.3ch;
	background-color: var(--blue);
}

.pitch .atamadaka::before {
	content: "";
	display: inline-block;
	height: 0.7ch;
	width: 0.7ch;
	margin-right: 10px;
	margin-bottom: 0.3ch;
	background-color: var(--red);
}

.pitch .nakadaka::before {
	content: "";
	display: inline-block;
	height: 0.7ch;
	width: 0.7ch;
	margin-right: 10px;
	margin-bottom: 0.3ch;
	background-color: var(--orange);
}

.pitch .odaka::before {
	content: "";
	display: inline-block;
	height: 0.7ch;
	width: 0.7ch;
	margin-right: 10px;
	margin-bottom: 0.3ch;
	background-color: var(--green);
}

.pitch .kifuku::before {
	content: "";
	display: inline-block;
	height: 0.7ch;
	width: 0.7ch;
	margin-right: 10px;
	margin-bottom: 0.3ch;
	background-color: var(--purple);
}
If you want to change the colors, you can just change the hex code inside of :root.
The color I chose for each pitch pattern is the same as Migaku Japanese, so if you're already used to their system you won't need to re-learn another. If you want to use different colors for the various pitch patterns, just change which variable is used. For example, change var(--green) to var(--blue), etc.
If you don't want pitch coloring at all, you can just remove the pitch class from the front/back template.
If you want to enable pitch coloring on the front of the card, you can add the pitch class.
More info is available in comments inside the note template.
Since the word is simply tagged with a class based on pitch, you're not limited to just colors for styling, you can use any css on it. Feel free to get creative.
What Do The Colors Mean?
#I used to link to the Migaku documentation that explained their pitch accent coloring system, but since they removed that page, I'll throw the chart here in case anyone's confused:
- heiban: blue
- atamadaka: red
- nakadaka: orange
- odaka: green
- kifuku: purple
How To Fix Wrong Pitch Color
#If you look at the {pitchAccent} field of the card, you may see more than one pitch graph. If you want to change the furigana pitch pattern to match one of the others on the list, you can do so by following these steps:
- Go to the card you want to edit in the card browser
- Click on the
{wordDictionaryForm}field - Click on this button to edit the field in HTML mode

- Edit the class name to be the name of the pitch pattern you want it to be

Pitch-marked Furigana
#It's possible for words to have multiple correct pitch patterns, and there's no way for my note type to automatically know which pattern is used in the sentence you mined. Therefore, by default, the card will show the first pitch pattern on the list of correct patterns.
If your dictionary has no pitch entry for the word, it will just show the plain furigana.
If you look at the {pitchAccent} field of the card, you may see more than one pitch graph. If you want to change the furigana pitch pattern to match one of the others on the list, you can do so by following these steps:
- Go to the card you want to edit in the card browser
- Click on the
{reading}field - Click on this button to edit the field in HTML mode
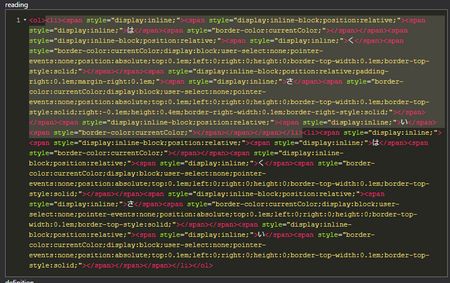
- The field will be an
<ol>containing several<li>. By default, the card will show only the first<li>, so you'll want to delete any<li>that are above the pattern you want
If you didn't understand anything I just said, it's probably best to not mess with it. Or maybe it's time to turn your life around and learn html? You do you.
Custom Styling For NSFW Images
#Choosing a Style
#My note type comes with several options for applying custom styles to NSFW images. The code for this is modified from Marv's NSFW Blur.
It is all done without Javascript.
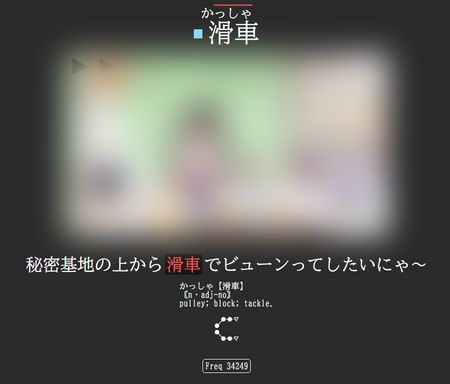
Before getting into the options you have, here's a preview of what a NSFW blur looks like.
Without Blur:
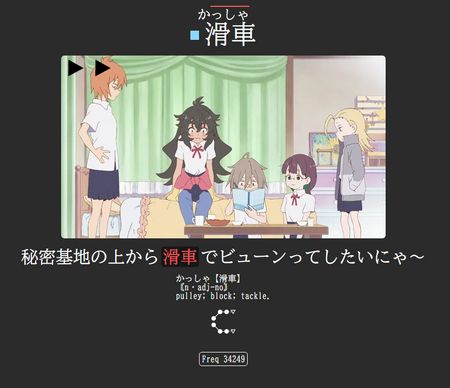
With Blur:
This feature is mostly useful for repping your cards on mobile, in case there are certain images you'd prefer people not be able to see on your phone.
My note type comes with 3 options for cards with NSFW images:
- NSFW images display on desktop, but are hidden on mobile (default)
- NSFW images are blurred on both desktop and mobile, and can be viewed by hovering/tapping the image
- NSFW images display on desktop, but are blurred on mobile (and can be viewed by tapping the image)
You can switch between these 3 options by going to the card styling, scrolling to the very bottom, and following the instructions there.
How to Mark a Card NSFW
#The NSFW image styling is based on your card tags. So in order to get this effect, all you need to do is add the tag NSFW to your card. Easy as that!
However, we can streamline this process a bit by adding a custom ShareX hotkey that automatically adds an image + the tag to the card.
Setting Up ShareX
#Most of the ShareX settings come from the rentry mining setup. Some of the instructions below come from Xelieu's Lazy Guide. You can follow these guides instead if you want to, but they need extra config in order to work with my note type. For that reason, I've paraphrased those to try to make the process as easy as possible for my specific note type.
For a quick and easy setup, you can just copy my ShareX settings (provided in the download). Simply drag these files into your documents/ShareX folder (assuming you have ShareX downloaded already).
If you your Anki profile is named something other than the default User 1, you'll also need to update the paths for the VN Image and NSFW VN Image buttons. You can do that by doing to Hotkey Settings > screenshot/nsfw/audio >override screenshot folder and changing the path name %ApplicationData%\Anki2\**YourAnkiProfileName**\collection.media.
This is unrelated to the NSFW blur, but if you ever want ShareX to record audio you'll also need to do the following:
- Go to
Hotkey settings > screen recorder > screen recorder options - Make sure you have FFmpeg downloaded and installed
- Install recorder devices
- Video source: none
- Audio source: virtual-audio-capturer
If everything went well you should have the following hotkeys:
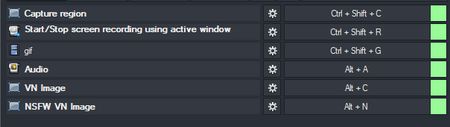
ctrl+shift+cis for normal screenshotsalt+cwill take a screenshot, save it to your anki media folder, and add it to your last created card. This hotkey was specifically chosen because shift generally skips text in visual novels.alt+nwill take a screenshot, save it to your anki media folder, add it to your last created card, and add theNSFWtag to that card.alt+awill record audio, save it to your anki media folder, and add it to your last created card.
Yomichan Audio Settings
#If you used my Yomichan settings, you may have some trouble with your audio. This is because my settings use the local audio server. You can either follow the instructions from that link to set it up (I recommend it), or alternatively, update your Yomichan audio sources to be Jpod, Jpod101, Jisho (in that order).
Note that my yomichan settings use multiple profiles, so you'll want to make that change to every profile you plan on using.
Yomichan Handlebars
#The features of this note type make use of custom yomichan handlebars. In case you don't want to completely import my yomichan settings, you can just copy my handlebars.
In case you're interested (or only want part of the functionality), I'll explain the things I changed.
In {{#*inline "expression"}} I added
<span class="
"></span>
<span class="
"></span>
<span class="
"></span>
This is the part that wraps the expression in the class for the pitch pattern. In order to get the actual name of the pitch pattern I added:
This code comes from yomichan's template doc.
If you use {pitch-accents} for furigana, and there's no pitch data found in your dictionary, it will say something like "No Pitch Data Found" by default. In order to show plain furigana instead, I changed the {{~else~}} clause of {{#*inline "pitch-accent-list"}} to be:
I wanted the {sentence} field on my card to not contain any whitespace, and I also wanted to strip out parenthesis, as well as any text within them. This is because anime subtitles will often put names inside of parenthesis, or furigana (that doesn't render properly).
To accomplish this I edited {{#*inline "cloze-prefix"}} and {{#*inline "cloze-suffix"}} to look like this:
Finally, I also use Aquafina water bottle#3026's frequency handlebars. This strips away the text from your frequency lists, and then gives you the one with the smallest number. That way you can sort your cards by frequency.
You can also mess with the options at the top if you would prefer a different sorting method or default value (value if there is no entry in your frequency dicionaries).
^(JLPT_Level)$
(INVALID opt-freq-sorting-method value)
Order Cards By Frequency
#As long as you're using my Yomichan handlebars (or are using my Yomichan settings), the frequency field on your cards should just contain a number. You can then use the AutoReorder addon to automatically reorder all the new cards in your collection based on the frequency.
After installing, you'll want to go to addons > autoreorder > config, which should give you something like the below image:
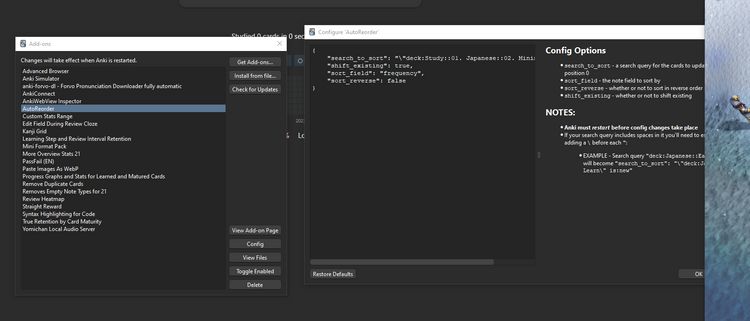
You'll want to use the following config:
{
"search_to_sort": "\"deck:Study::01. Japanese::02. Mining\" is:new",
"sort_field": "frequency",
"sort_reverse": false,
"shift_existing": true
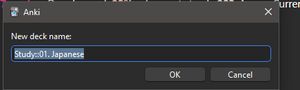
}For the search_to_sort field you'll want to replace Study::01. Japanese::02. Mining with the name of your deck. To easily get the name of your deck, you can rename your deck, and then copy the text in the popup.
Once you're done, restart Anki.
The AutoReorder addon will automatically reposition your new cards every time you re-open Anki. However, if you leave Anki open 24/7 like I do, you can also go to Tools > Reposition Cards to do it manually. I generally do this before every review session.
Migrating From Previous Versions
#If you're upgrading from a previous version of my note type, there may be extra steps you need to do to convert your cards to the newer version.
Migrating From V2.3
#Before trying to migrate old cards to V2.4, make sure you have set up V2.4
The biggest change between V2.3 and V2.4 is how Yomichan will export frequency information (to allow you to sort by the frequency field). Because of this, as well as new styling, you need update the frequency of all of your old cards in order to convert to the updated note type. Luckily, Aquafina water bottle#3026 has written a script to do that for you automatically.
To do this you'll want to follow the instructions on Marv's github page on how to backfill old cards. Make sure to follow the command line version.
Before running any commands, I'd recommend backing up your Anki collection. You can do this within Anki by doing File > Create Backup.
When following his instructions, you'll want to follow his first 3 recommended commands:
git clone "https://github.com/MarvNC/JP-Resources.git"
cd JP-Resources
cd frequency
However, when you get to the step to actually run the backfill script, you'll want to use the following command (not listed on his page):
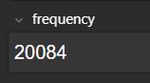
python backfill.py "wordDictionaryForm" --query "\"note:Eminent V2.3\"" --freq-field "frequency" --default 999999This will update any of my previous note types to have the proper frequency information on them. This command will not work on Powershell.
If it worked, your cards' frequency field should look like this
If that worked correctly for you, you'll then want to update to my new Yomichan settings. If you don't want to copy all my settings, you can also just replace the Anki Template settings so that future cards have frequency that matches this format.
After that, you can just select all of your V2.3 cards, and Change Note Type to 2.4. The word field has been removed, and some fields have been reordered, but as long as you just match the names of the fields it should be fine.
Finally, follow the instructions for Ordering Cards By Frequency
Migrating From Versions Prior to V2.3
#If you have a prior version of my note type, do not change your cards to the new version. Instead, import the new version and make your future cards use this note type.
The reason is that older versions used a script on the card to highlight the word in the sentence. However, the new version has yomichan send over the sentence with the word pre-highlighted. This means that if you changed your old cards to the new note type, the highlight functionality would be broken for all of those cards.
If you're fine with that, feel free to change your old cards to the new version. It's also possible to manually re-add that highlight script and edit the yomichan field to be the same as before. I don't really recommend this, but you do you.
If you're using my old yomichan settings, you'll also want to import my new settings or just read the other parts of this page to piece together the pieces you need (see the field explanations and handlebars settings).
My yomichan settings use the offline audio server as described by TMW, so if you aren't using that, you'll want to edit your audio sources to add back online sources.
If you're using my note type in conjunction with animebook, you'll want to import my new animebook settings.
The only change to the animebook settings is that it will only add a sentence to the card if the sentence field is blank. Feel free to just change that setting instead of re-importing if you want.
Changelog
#01/28/2023
- Target word, sentence, and definition are now editable by default if you have the Edit Field During Review (Cloze) addon
- Made it easier to toggle pitch coloring
- Removed the now redundant "word" field
- Reordered fields so that the ones that are edited the most are at the top
- Added support for conditional styling for NSFW images
- Updated styling for frequency
- Added rounded edges to images and a slight shadow because
derpydoopie#8988wanted it to look "more modern" :) - Updated max image width to be a multiple of 1920
- Fixed a bug where the reading wouldn't display properly on Mac OS (thanks to loaphage!)
- If you have 3+ pitch dictionaries, only the first 2 pitch graphs are shown now
- If you have multiple frequency lists, my yomichan settings will now only export the one with the lowest frequency (so you can now sort cards by frequency)
- Fixed bug where yomichan wasn't stripping all of the spaces/parenthesis from the sentence
- Images will no longer appear larger than the width of the window
- Cards will no longer exceed 1200px in width, and will be padded with whitespace on both sides if the window size exceeds that (thanks to
DaNautics#8833for the idea) - Increased the font size of Japanese text inside the definition (thanks to
derpydoopie#8988) - Disabled pitch graphs, as the information was redundant with pitch marking on the furigana. This can be reanabled in the card's back template
6/18/2022
- Rewrote Kanji Hover and re-enabled it in the note type
6/17/2022
- Changed dictionary centering css to be on card instead of in handlebars
- Changed pitch graph coloring css to be on card instead of in handlebars
- Rearranged the order of fields so that
wordDictionaryFormappears beforeword. This change allows for proper detection of duplicates. - Changed image to be on the back only
- Added pitch info to furigana
- Added regex patterns to remove whitespace and text within parenthasis from the sentence.
- Changed the font to BIZ UD Mincho
12/4/2021
- Updated pitch accent colors.
- Removed pitch accent colors from the wordDictionaryForm, and instead made a colored square next to the word.
- Added style overrides to bold text, to accomodate proper noun mining and definition highlighting.
7/10/2021
- Added pitch accent coloring.
- sentenceAudio replay button is now correctly repositioned when the card has no wordAudio.